เปิดใช้งาน Pipeline ใน Project
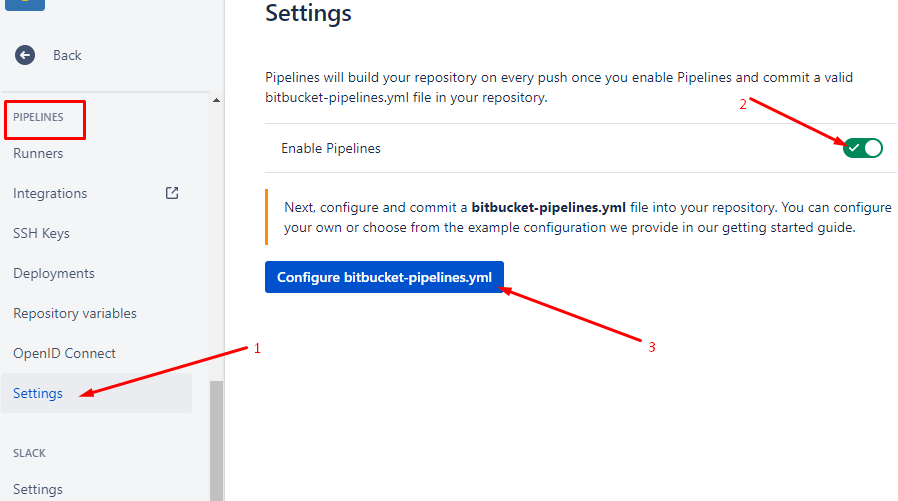
1. ไปที่ Repository settings -> Settings ->
2-3. เปิดใช้งาน Enable Pipelines และคลิกที่ “Configure bitbucket-pipeline.yml”
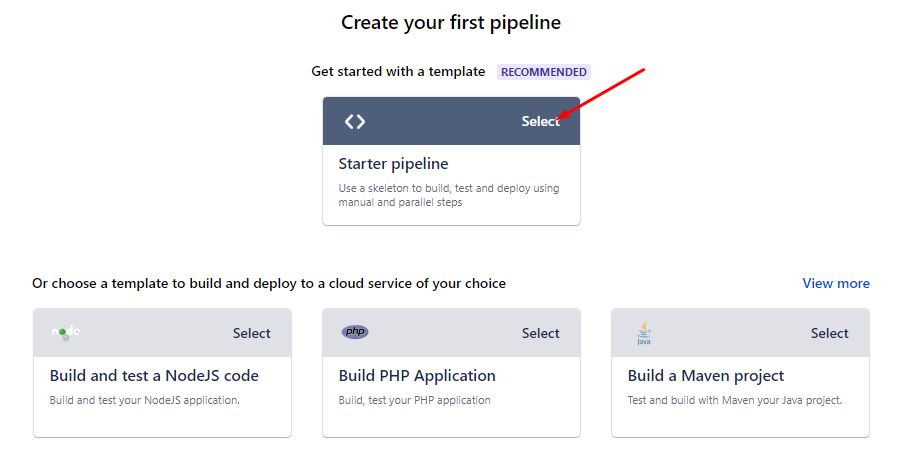
4. เลื่อนลงมาด้านล่างเลือก “Select” ในส่วนของ “Starter pipeline”
5. แก้ไข Pipeline ตามขั้นตอนที่ต้องการ deploy ตัวอย่างเป็นการ deploy NodeJS website ไปบน Linux Server
1 | image: node:18 |
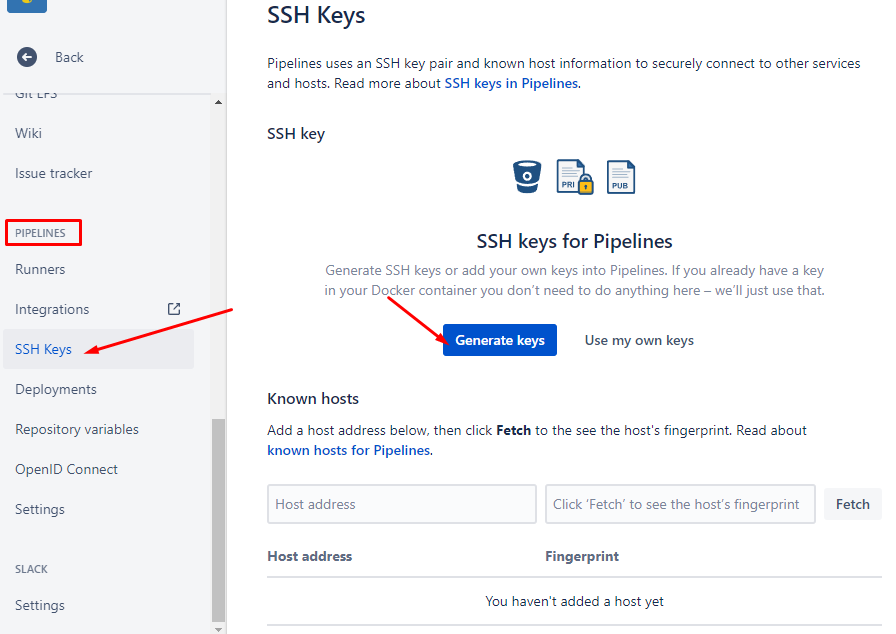
ตั้งค่า SSH Keys
6. ไปที่ Repository settings -> SSH Keys ในส่วนของ Pipeline
7. กดปุ่ม “Generate keys” เพื่อสร้าง public key ให้ Bitbucket เชื่อมต่อ Server เราได้
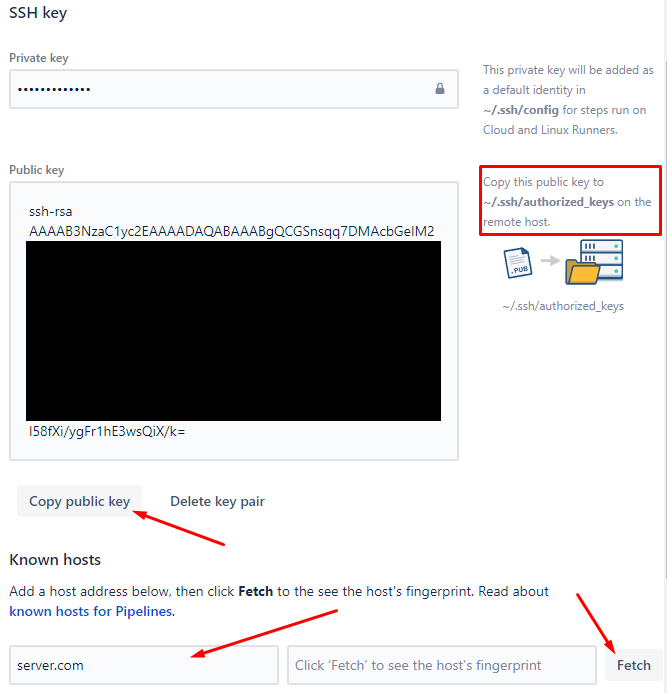
8. Copy public key ไปไว้ที่ “~/.ssh/authorized_keys” ของ user ที่จะให้ Bitbucket ใช้ SSH เข้าไปได้
9. ใส่ Domain หรือ IP ของ Server ถ้า SSH ไม่ได้ใช้ Port 22 ให้ใส่ “:” ตามด้วยเลข port (server.com:22)
10. คลิกที่ “Fetch” เพื่อเอา Fringerprint จาก Server
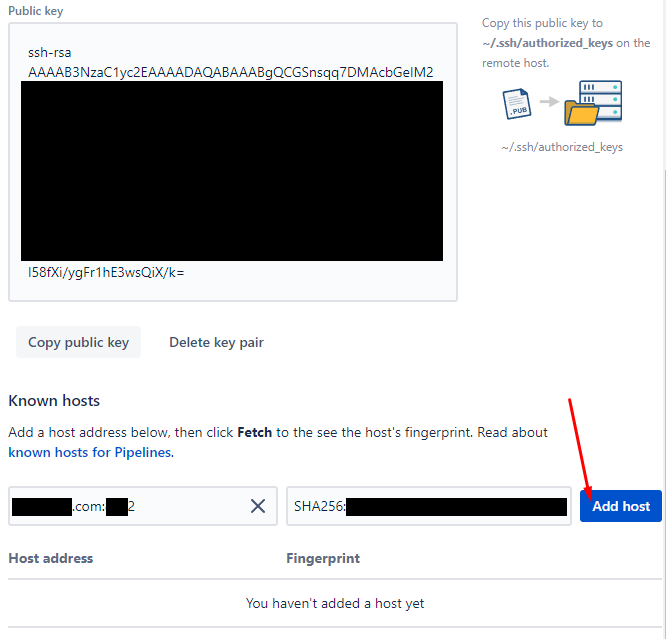
11. คลิกที่ “Add Host” เพื่อบันทึก Fringerprint
ทดสอบการทำงานของ Pipeline
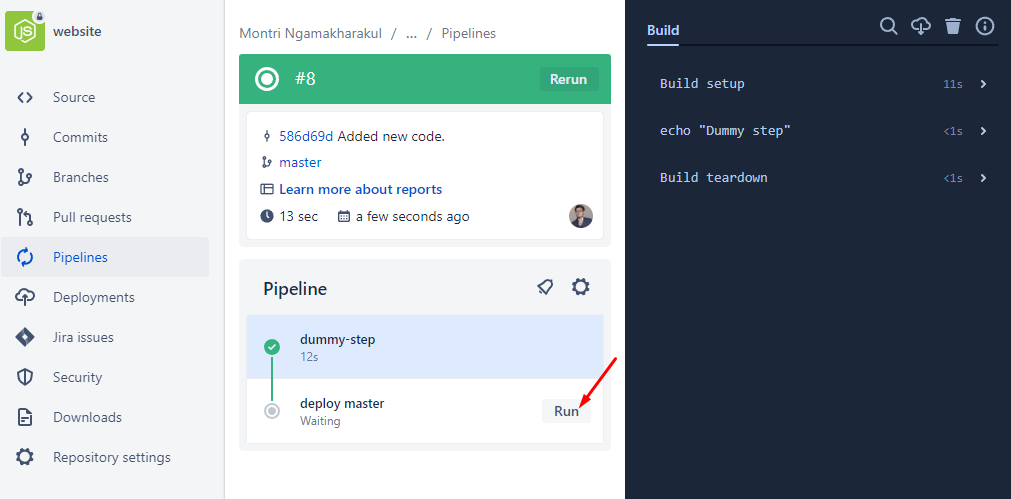
6. ไปที่เมนู Pipeline เลือก commit ที่ต้องการรัน pipeline
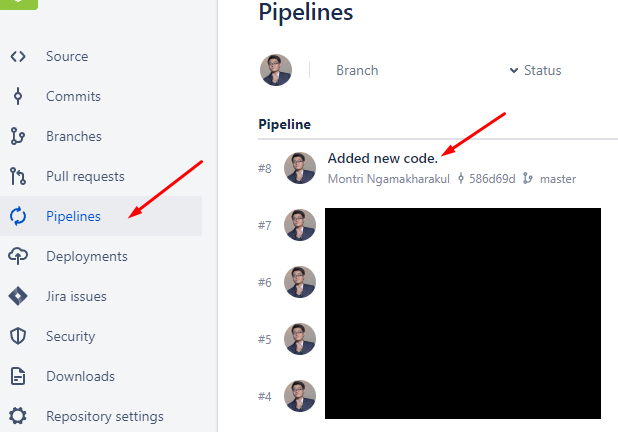
7. คลิก “Run” เพื่อเริ่มทำงาน pipeline และดูผลลัพธ์การทำงาน